101Leafy researched the games.
Chocolate Secret
A level in Chocolate Island: map spot $3B, level data $117. The timer starts at 300.
From the books
チョコレー島ひみつのコース1 「坂の多い洞窟。後半は、溶岩に沈む足場を連続ジャンプで渡る。」
"A cave with many slopes. In the second half, you jump across platforms that sink into the lava." (our translation)
スーパーマリオブラザーズ百科 任天堂公式ガイドブック (Shogakukan, 2015) p59
From the magazines
巨大な洞くつのコースだ 「巨大な洞くつのようなコースだ。一気に下まで降りてしまおう。」
"A course like a huge cave. Head all the way down in one go." (our translation)
スーパーマリオワールド 完全攻略本 Vol.3 (ファミリーコンピュータMagazine 1991 No.4 supplement, Tokuma Shoten, 1991) p4
チョコレー島 ひみつのコース1 「チョコレー島のコース2へ行こう。まず最初の面でコインを好きなだけ取り、次に進んだ面を残りタイム250以上で通過すると、鍵のある面へと進むことができる。そこで鍵を鍵穴へ差し込むと、コース2の左上にある土管へと進めるようになる。この土管へ入った先には、ひみつのコース1があるぞ。」
"Go to Chocolate Island course 2. Take as many coins as you like in the first area, then pass the next area with 250 or more time left, and you reach the area with the key. Put the key in the keyhole there and you can go to the pipe at the top left of course 2. Secret course 1 is past that pipe." (our translation)
スーパーマリオワールド 完全攻略本 Vol.3 (ファミリーコンピュータMagazine 1991 No.4 supplement, Tokuma Shoten, 1991) p5
巨大な洞くつを進もう 「コース2で鍵を取ると、この面へ進むことができる。とても長い面だぞ。」
"Get the key in course 2 and you can go to this area. It is a very long one." (our translation)
スーパーマリオワールド 完全攻略本 Vol.3 (ファミリーコンピュータMagazine 1991 No.4 supplement, Tokuma Shoten, 1991) p12
高いところに中間バー 「中間ゲートが高いところにある。手前からジャンプすればバーを切ることができるけれど、ブルがいるのでバーを切るのが難しいぞ。」
"The midway gate is up high. You can cut the bar by jumping from just before it, but a Chargin' Chuck there makes it hard." (our translation)
スーパーマリオワールド 完全攻略本 Vol.3 (ファミリーコンピュータMagazine 1991 No.4 supplement, Tokuma Shoten, 1991) p12
アッパレだけだ 「アッパレが1匹出現して、ハンマーをたくさん落としてくる。他には特に何もない面なので、アッパレと戦ってみたいと思う人以外は行かないほうがいいかもしれない。」
"One Amazing Flyin' Hammer Brother appears and drops lots of hammers. There is nothing else in this area, so unless you want to fight it, you may be better off not going." (our translation)
スーパーマリオワールド 完全攻略本 Vol.3 (ファミリーコンピュータMagazine 1991 No.4 supplement, Tokuma Shoten, 1991) p13
一気に下へ 「一気に下へ降りていく面だ。メットがいるので、けとばしながら進んでいこう。ただし、途中にはブラックパックンが口を開けて待っているところがあるので、注意して進もう。」
"An area where you drop straight down. There are Buzzy Beetles, so kick them as you go. But partway down, Munchers wait with their mouths open, so be careful." (our translation)
スーパーマリオワールド 完全攻略本 Vol.3 (ファミリーコンピュータMagazine 1991 No.4 supplement, Tokuma Shoten, 1991) p13
全速力で走り抜けろ 「ここから先にある溶岩池に浮かぶ土台は、マリオが乗ると沈む。全速力で走り抜けよう。」
"The platforms floating in the lava pool ahead sink when Mario stands on them. Run across at full speed." (our translation)
スーパーマリオワールド 完全攻略本 Vol.3 (ファミリーコンピュータMagazine 1991 No.4 supplement, Tokuma Shoten, 1991) p13
- Name in the game
- CHOCOLATE SECRET
- World
- Chocolate Island
- Map spot (translevel)
- $3B
- Level number
- $117
- Timer
- 300
- Normal exit
- map event $4F
Map
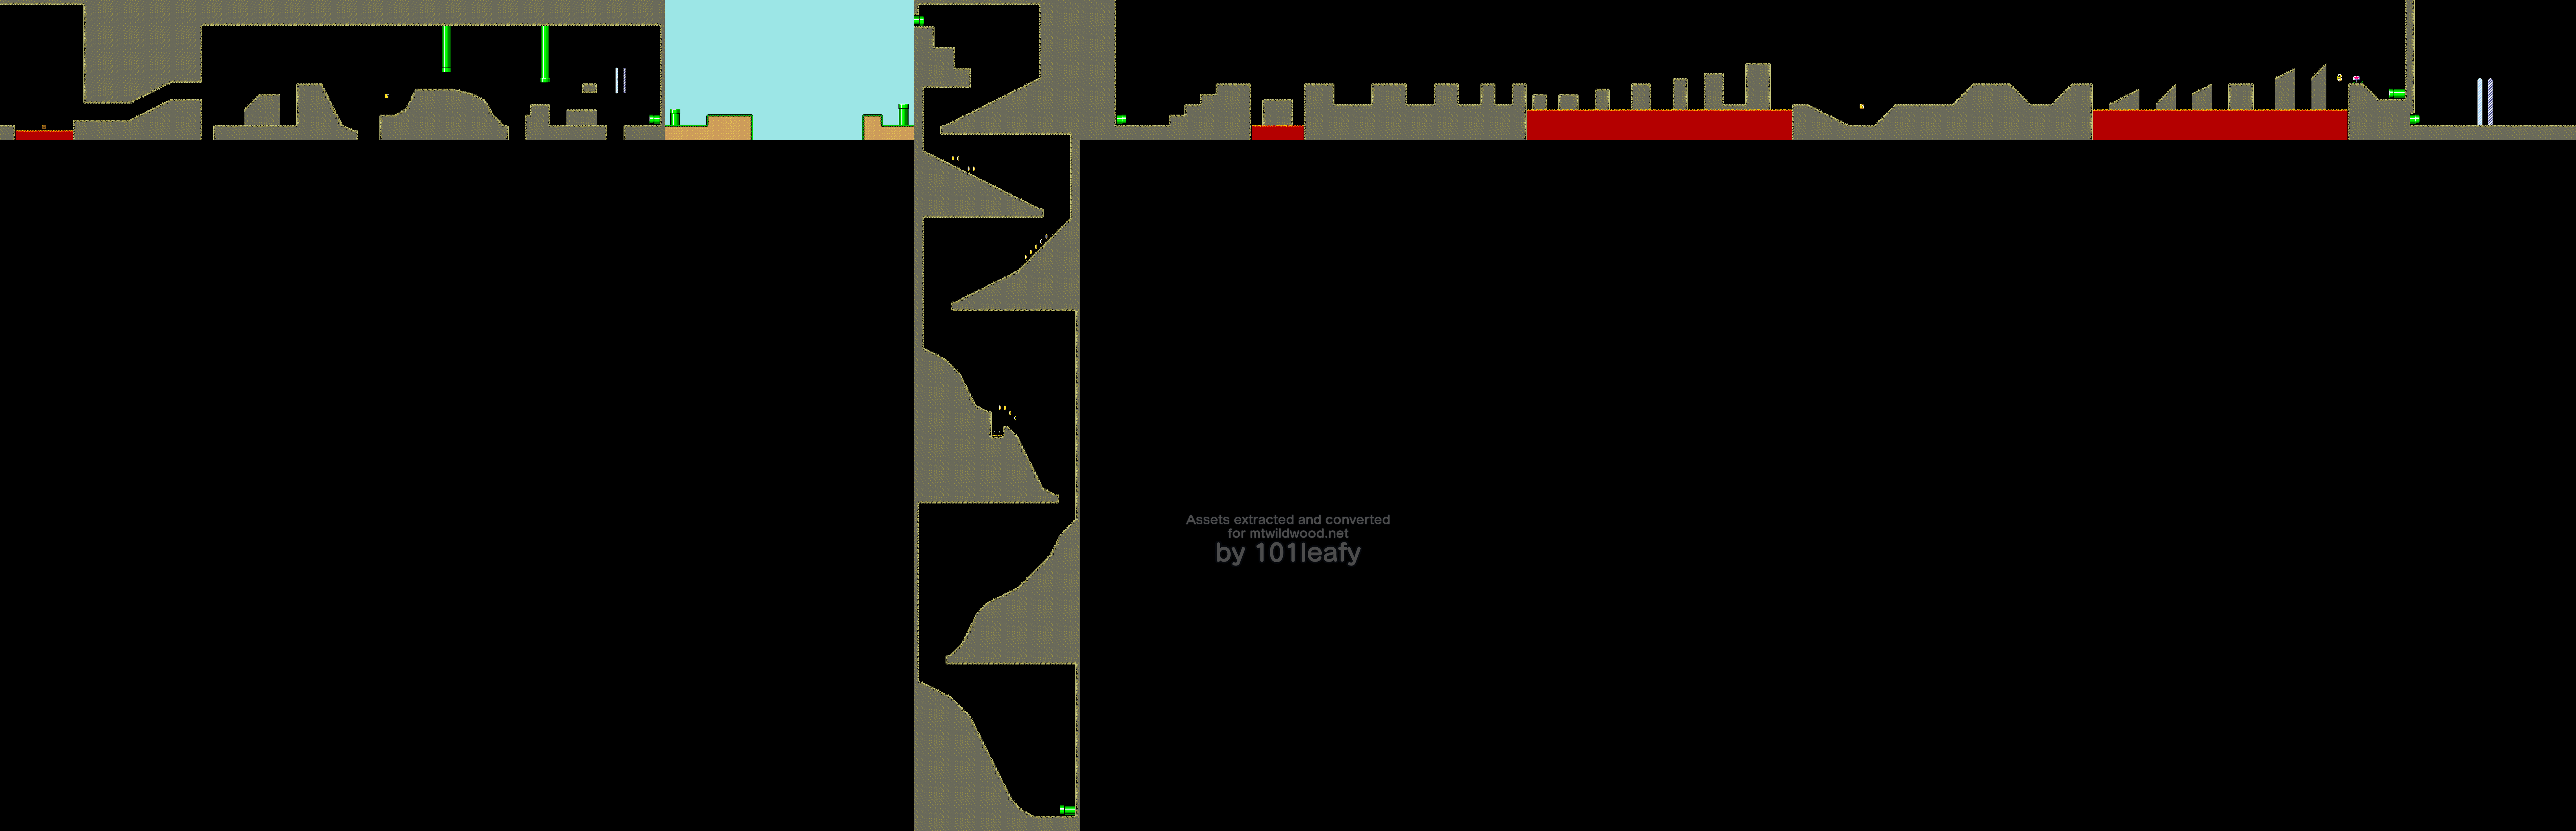
Each area was loaded with the game's own code and drawn at 1x from the blocks it left in memory. The areas reached through screen exits sit side by side, left to right. Red boxes mark enemies and items. Green boxes mark the other objects: platforms, the goal tape, switches, and the like. Dashed boxes mark the sprites not matched to a name. Blue boxes mark the pipe or door of each screen exit. An exit on a screen with no pipe or door is marked at the start of that screen. A box links to the enemy or item page, to its row on the objects page, or to where the exit leads.
Sprites
From the sprite data of each area (ROM $07:D9EF for the first). Each id was spawned with the game's own loader and matched by eye to the enemy lists in the manuals, Mario Mania (pp50-52), and the Shogakukan guide. Ids that are not matched stay as numbers. Ids with no enemy or item page link to their row on the objects page.
| Name | Sprite id | Count | Area |
|---|---|---|---|
| Blargg | $A8 | 1 | $117 |
| Jumping Board | $2F | 1 | $117 |
| Buzzy Beetle | $11 | 20 | $117, $1ED |
| Chargin' Chuck | $97 | 5 | $117 |
| Falling platform | $C4 | 4 | $1C0 |
| Flying grey blocks | $9C | 1 | $1C0 |
| Amazing Flyin' Hammer Brother | $9B | 1 | $1C0 |
| $F5 (not matched) | $F5 | 1 | $1EC |
| Spike Top | $2E | 12 | $1EC |
| Chargin' Chuck | $91 | 6 | $1EC |
| Goal tape | $7B | 1 | $1EE |
Screen exits
Where each screen's exit leads. Every pipe and door on one screen goes to the same exit.
- Area $117, screen 5: Area $1C0
- Area $117, screen 7: Area $1ED
- Area $1C0, screen 2: #3 Lemmy's Castle (secondary exit $C0)
- Area $1ED, screen 9: Area $1EC
- Area $1EC, screen 15: Area $1EE
- ROM names $04:A172, event $05:D643, sprites $07:D9EF
Sunken Ghost Ship · #6 Wendy's Castle · Chocolate Fortress · Chocolate Island 5 · Chocolate Island 4 · Choco-Ghost House · Chocolate Island 1 · Chocolate Island 3 · Chocolate Island 2