101Leafy researched the games.
Star World 1
A level in Star World: map spot $58, level data $134. It has two exits, and the secret one opens a path of its own on the map. The timer starts at 300.
From the books
ネイティブスターコース1 「クルクルブロックが敷き詰められており、スピンジャンプで掘り進む。」
"Packed with Rotating Blocks. You dig through with spin jumps." (our translation)
スーパーマリオブラザーズ百科 任天堂公式ガイドブック (Shogakukan, 2015) p59
From the magazines
コース1 「スタートしたら、右側のクルクルブロックをこわして進んでいこう。すると鍵があって、隣の鍵穴へ差せばクリアとなるぞ。」
"After the start, break the turn blocks on the right and keep going. There is a key, and putting it in the keyhole next to it clears the course." (our translation)
スーパーマリオワールド 完全攻略本 Vol.3 (ファミリーコンピュータMagazine 1991 No.4 supplement, Tokuma Shoten, 1991) p15
クルクルブロックばかり 「クルクルブロックの多い面だ。スピンジャンプでどんどんこわそう。」
"An area full of turn blocks. Break through them with spin jumps." (our translation)
スーパーマリオワールド 完全攻略本 Vol.3 (ファミリーコンピュータMagazine 1991 No.4 supplement, Tokuma Shoten, 1991) p16
ブロックをこわして進め 「この面はブロックをこわしていかないと話にならない。そこでスタートしてすぐのところにスーパーキノコがある。あとはスピンジャンプだ。」
"You get nowhere in this area without breaking blocks. So there is a Super Mushroom right after the start. After that, spin jump." (our translation)
スーパーマリオワールド 完全攻略本 Vol.3 (ファミリーコンピュータMagazine 1991 No.4 supplement, Tokuma Shoten, 1991) p16
本当のゴールはどこだ? 「先のコースへ進むための本当のゴールは、スタートしてすぐのところにある。ここにある鍵をすぐ横にある鍵穴へ差し込めば、これでクリアしたことになり、コース2へと進むことができるぞ。」
"The real goal that leads to the next course is right after the start. Put the key here in the keyhole right beside it and the course counts as cleared, and you can go on to course 2." (our translation)
スーパーマリオワールド 完全攻略本 Vol.3 (ファミリーコンピュータMagazine 1991 No.4 supplement, Tokuma Shoten, 1991) p16
無敵になって進め 「このマップの左右どちらにもスターがある。どちらかのスターを取って無敵になっておけば、少しは進むのが楽になるはずだ。」
"There is a Star on both the left and the right of this map. Take either one to become invincible and the going should get a little easier." (our translation)
スーパーマリオワールド 完全攻略本 Vol.3 (ファミリーコンピュータMagazine 1991 No.4 supplement, Tokuma Shoten, 1991) p16
ゴールへ行ってみると 「最後の土管へ入るとゴールがある。でも、このゴールをクリアしても、先へのルートが開くことはない。本当のゴールは右上の鍵穴だ。」
"Enter the last pipe and there is a goal. But clearing this goal does not open the way ahead. The real goal is the keyhole at the top right." (our translation)
スーパーマリオワールド 完全攻略本 Vol.3 (ファミリーコンピュータMagazine 1991 No.4 supplement, Tokuma Shoten, 1991) p16
- Name in the game
- STAR WORLD 1
- World
- Star World
- Map spot (translevel)
- $58
- Level number
- $134
- Timer
- 300
- Normal exit
- map event $51
- Secret exit
- map event $52
Map
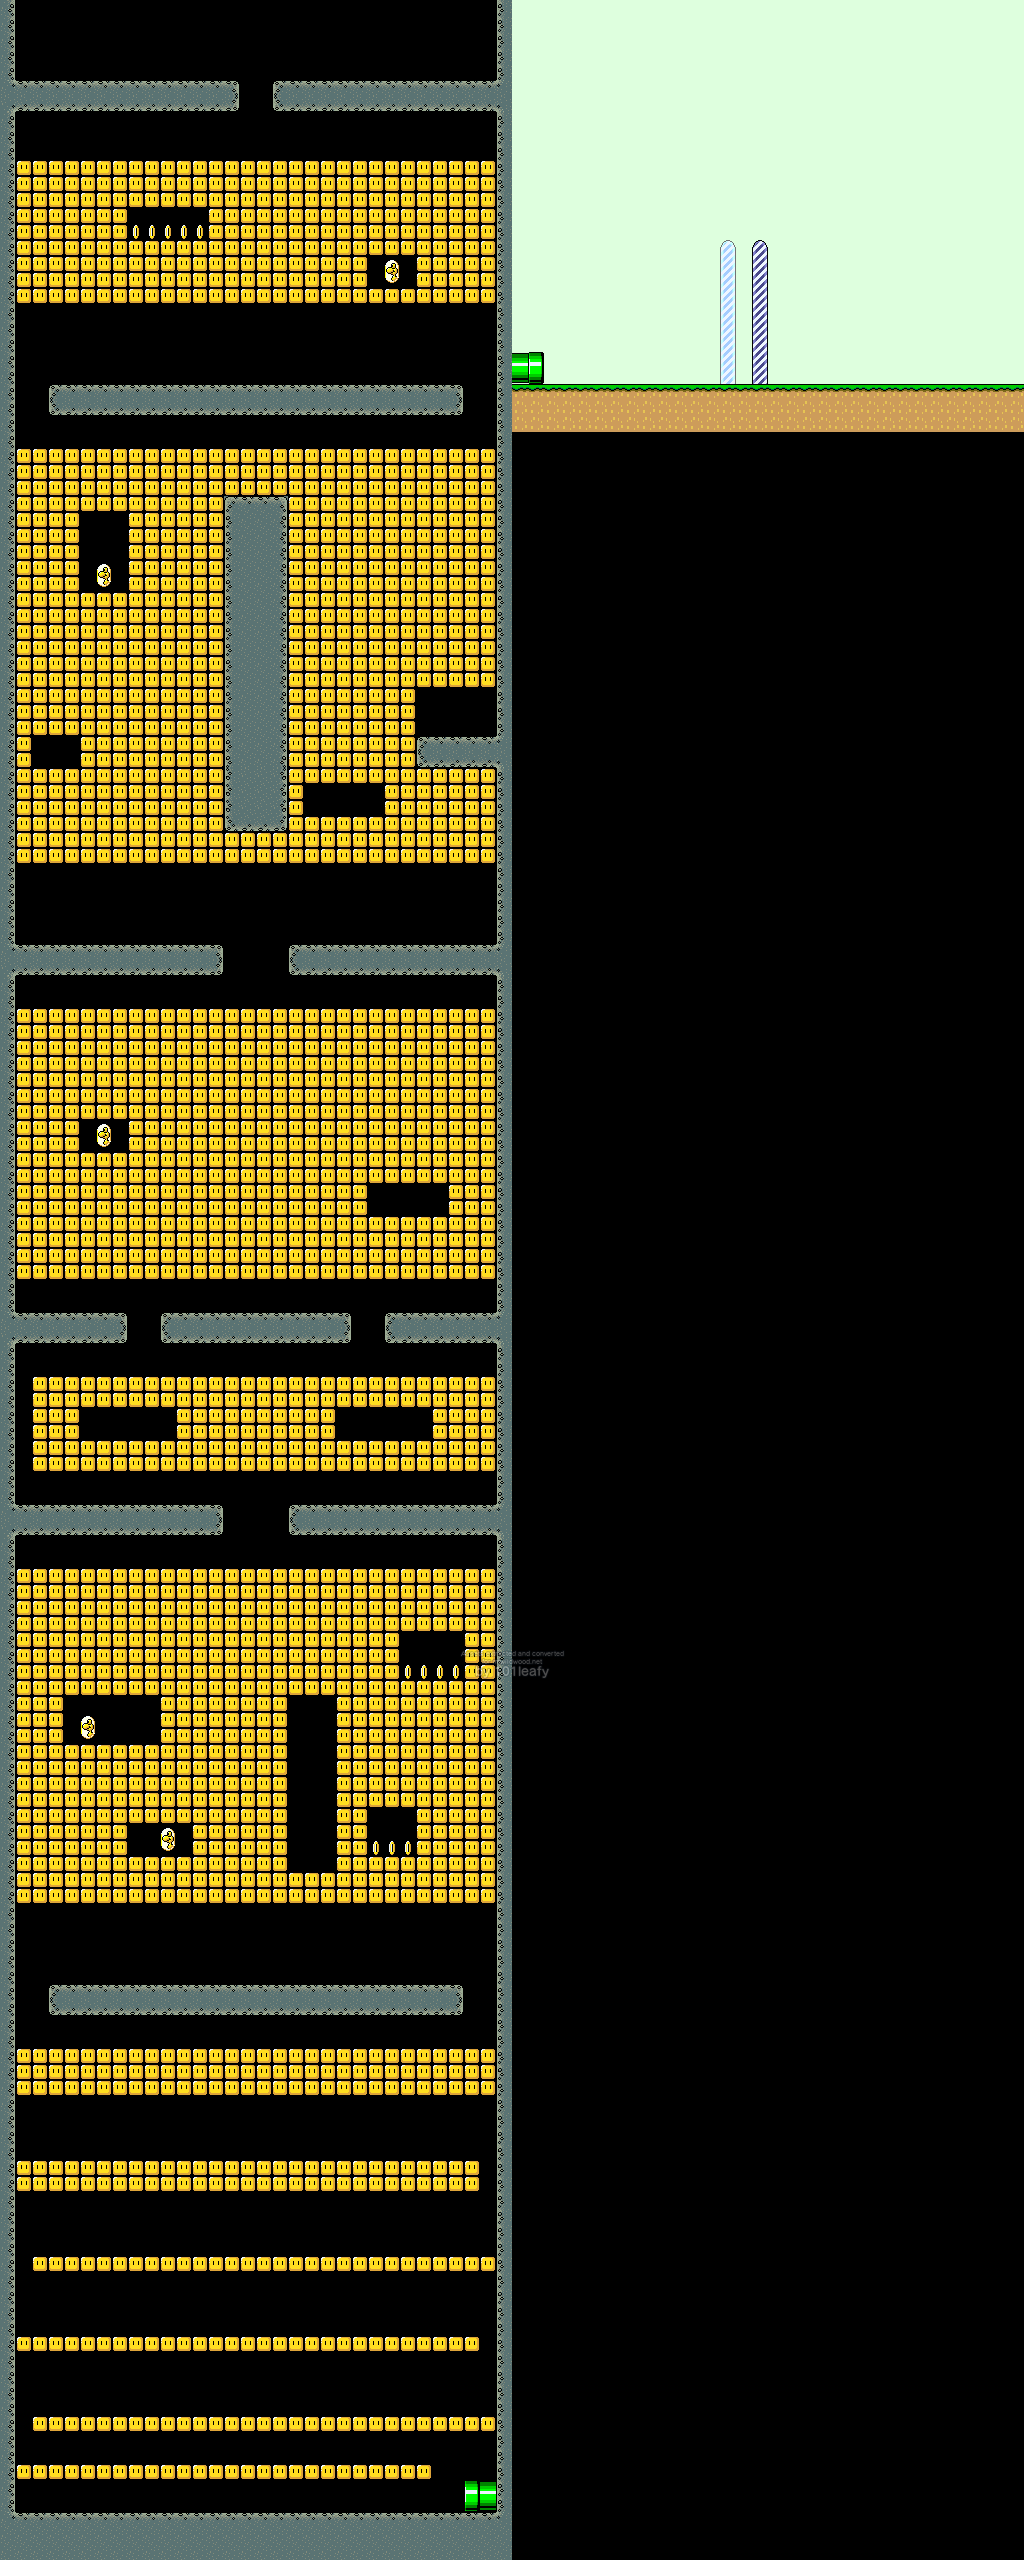
Each area was loaded with the game's own code and drawn at 1x from the blocks it left in memory. The areas reached through screen exits sit side by side, left to right. Red boxes mark enemies and items. Green boxes mark the other objects: platforms, the goal tape, switches, and the like. Dashed boxes mark the sprites not matched to a name. Blue boxes mark the pipe or door of each screen exit. An exit on a screen with no pipe or door is marked at the start of that screen. A box links to the enemy or item page, to its row on the objects page, or to where the exit leads.
Sprites
From the sprite data of each area (ROM $07:E1C5 for the first). Each id was spawned with the game's own loader and matched by eye to the enemy lists in the manuals, Mario Mania (pp50-52), and the Shogakukan guide. Ids that are not matched stay as numbers. Ids with no enemy or item page link to their row on the objects page.
| Name | Sprite id | Count | Area |
|---|---|---|---|
| Super Mushroom | $74 | 1 | $134 |
| Keyhole | $0E | 1 | $134 |
| Key | $80 | 1 | $134 |
| Cape Feather | $77 | 1 | $134 |
| Fire Flower | $75 | 1 | $134 |
| 1-Up Mushroom | $78 | 1 | $134 |
| Starman | $76 | 3 | $134 |
| Koopa Troopa | $04 | 1 | $134 |
| Koopa Troopa | $05 | 2 | $134 |
| Koopa Troopa | $07 | 3 | $134 |
| Koopa Troopa | $06 | 3 | $134 |
| Winged Koopa Troopa | $0A | 5 | $134 |
| Winged Koopa Troopa | $09 | 6 | $134 |
| Egg | $2C | 1 | $134 |
| Goal tape | $7B | 1 | $1D6 |
Screen exits
Where each screen's exit leads. Every pipe and door on one screen goes to the same exit.
- Area $134, screen 9: Area $1D6
- ROM names $04:A1AC, event $05:D660, sprites $07:E1C5